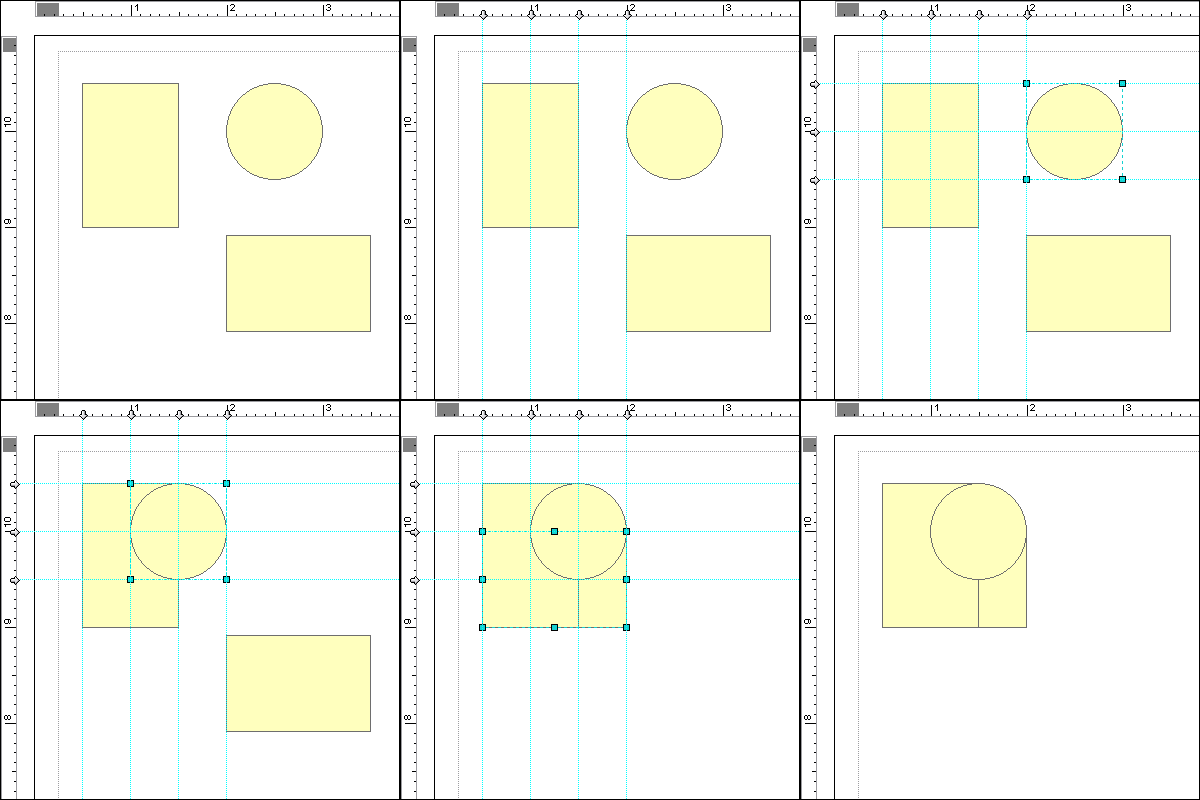
The solution is as simple as aligning graphical elements (drawing various shapes) and applying a Union process to make a single shape.
- Begin by adding two Rectangle elements and either a Circle or an Ellipse element (holding Ctrl while dragging the boundary of an ellipse will create a circle by keeping the aspect ratio of the width and height equal; the same goes for drawing a square with the Rectangle tool) to the Layout view of an ArcMap project
 |
| Add two Rectangles and a Circle |
- Align the top of the circle with the tall rectangle and the right side of the circle with the wide rectangle. This can be done by either using ruler guides or by selecting two objects and using alignment tools that may be on a toolbar, or by right clicking on the selected objects and choosing an alignment method from the Align sub-menu.

- Once the objects are aligned, select all three elements, right click on them and navigate to the Graphic Operations menu, and choose Union
 to blend all three objects together into a single element
 , Subtract
  ); some even with negative space (Remove Overlap
 ).
).The following is a quick example of a few of these methods. The inset title box was flipped horizontally, and a couple of additional boxes were Unioned to extend the space for the scale bar. The north arrow box was simply a circle with three quarters Subtracted from a digitized polygon. Guides assisted the alignment for clean and even corners.
Note: Since these are vector graphics, the elements can be easily scaled with a clean look. In some cases, however, if the shapes are not aligned together precisely, distortions can occur where two elements were joined together.


1 comment:
Case in point, he sharp out how advertising firms www.uk-essay.net/custom-essay are known for pegging 1-3% ROI as the normal victory of post office based mail fights.
Post a Comment