Showing posts with label hardware. Show all posts

Tuesday, April 25, 2017

Setup Arduino Print Line / Debug Print / Console Log Messaging

It took me a few extra minutes to figure out why any Serial.println() statements weren't appearing in my Arduino IDE's Serial Monitor. I'm brand new to Arduino coding, but it seemed like if you click the Serial Monitor icon your debug/print line messages should show up there.

For this basic example, I set the Arduino Uno's onboard LED on Pin 13 to blink twice per second, with a println() statement running just after each change of the LED's state. Esssentially:

  • Turn on the LED
  • Write me a message that says On
  • Turn it off
  • Write Off
  • Etc.


It turns out that I needed to set the channel to communicate with the IDE in code.

Inside void setup(){} add the line Serial.begin(9600); where the value 9600 matches the baud rate in the Serial Monitor.


That's it. It begins writing to the monitor as soon as you upload the sketch and the device resets itself.

There's some more information about the begin() method on the Arduino Language Reference

Friday, February 14, 2014

Manage SD Card Media with an Android Tablet

I love my Nexus 7.  It's the 2012 version and when I got it for Hanukkah, I pretty much entirely stopped using my laptop.  It's a large enough screen while still being small, light, and portable. It's powerful enough to be a solid graphics post-production workstation for photos from my adventures, and it was quite a bit less expensive than similar tablets.  There are tons of really powerful (FREE) apps that can tune my pictures and really make my photos pop!

The only drawback to the Nexus is that I've had to transfer media from my old GoPro HD Hero or my point & shoot camera to an intermediate device before I can dig into editing the files on the tablet.  I'll have to:
  1. Connect the camera/card to a computer
  2. Transfer the files to the computer
  3. Connect the tablet to the computer and transfer again, or e-mail the photos to myself
This also implies that I have both a mini-USB cable for the cameras, and a micro-USB cable for the tablet.

Solution:


  1. Any micro-USB OTG cable ("On The Go" cable): $1-2

  1. Nexus Media Importer app: $4 on Google Play

Setup:

  1. Buy the card reader and the OTG cable. With shipping, it's still probably under $10.
  2. Download Homesoft's Nexus Media Viewer and test out your new cable and card reader. If you can successfully view photos with this app, uninstall it and buy the Nexus Media Importer app
That's it! It's a pretty solid app.  Simple to use, simple to copy data to your tablet, and it has some pretty sweet methods to select the specific files or groups of files that you want out of a given directory.

It also works for other types of data (video, music, documents, folders, etc.)

Tuesday, November 6, 2012

Know your scuba cylinders

Various sizes of aluminum (top rows) and steel
cylinders (bottom rows, with black tank boots)

Scuba cylinders come in a wide range of sizes, colors, and material; each of which can be used for a variety of diving conditions, although certain types of diving may require a more specific type of cylinder.  Some issues include selecting a tank to hold primary gas for recreational diving, backup gas for extended range diving, extra bottles for special mixes for deep diving ("bottom gas") or decompression, or even specifically for non-breathing/inflation purposes only.  Beyond size alone, scuba tanks can have different buoyancy characteristics, making cylinder choice an important consideration for a given dive.

Cylinder Types:
Scuba cylinders are made from alloys of either aluminum or steel:

Aluminum cylinders are generally less expensive and lighter than steel cylinders.  Rental tanks are commonly aluminum 80's ("AL80's") which means that the cylinder holds about 80 cubic feet of gas at its working pressure of 3000 psi.  Some dive charters use smaller AL72's to limit divers' bottom time.  Decompression bottles (usually in the ballpark of AL40's) are light weight and streamlined.  Smaller cylinders like AL13-19's are sometimes filed with Argon and are used solely to inflate a drysuit (better thermal protection than air/nitrox).

Aluminum cylinders are flat on the bottom and can stand up without a plastic boot.  A boot will help protect the cylinder from scratches, however it will also trap water and debris so it is important to rinse cylinders with a boot thoroughly after diving in salt water or silty, sandy conditions.

AL80's are a great investment for open water and cavern divers who are buying their first cylinder(s).  The cost-to-volume ratio is great, and they aren't too difficult to transport to- and around a dive site, although they may be a bit long for very short divers.  An AL80 can give a diver enough bottom time to be limited only by their diving tables' No-Decompression Limits (NDL's). Aluminum 63's are shorter and generally more comfortable, at the cost of less gas and limited bottom time. The buoyancy characteristics of aluminum cylinders make them heavy (negative) at the beginning of a dive and become positively buoyant (float) as the cylinder empties, so a diver should plan to be slightly over weighted at the beginning of a dive to avoid kicking to stay down at 15-20' for a safety stop on a depleted tank.   Naturally, aluminum cylinders do not rust, but may still corrode when exposed to contaminants such as salt water, oil, etc., forming aluminum oxide.  Aluminum cylinders are more resistant to damaging amounts corrosion than rusting steel cylinders.  When aluminum oxide forms it acts as a barrier, hindering further corrosion deeper into the cylinder wall.  Steel cylinders come in two varieties: high pressure (3300-3500 psi) and low pressure (2400 to 2640 psi) cylinders (HP & LP, respectively).  Steel cylinders are a bit more expensive to purchase new, however with proper care a steel cylinder has a virtually infinite lifespan (decades old cylinders are still in proper service today).  The added weight of steel makes these cylinders negatively buoyant (heavier than water) throughout the dive, so a diver will not need as much weight than if s/he were diving a single aluminum tank.  It is common for divers using doubled steel cylinders to dive without any additional weight at all. Steel cylinders usually have a round bottom which makes then unable to stand up on their own without a tank boot.
Boyle's law (relating pressure & volume) illustrates that filling a smaller space with a higher pressure allows a cylinder to be smaller than that of its lower pressure counterpart; so a HP80 steel cylinder will be a bit shorter than a common AL80.  HP80 cylinders are are a breeze to dive since they're so small.  Further, a HP100 is closer to the size of an AL80, although the HP100 is a bit heavier and it has the benefit of around an extra 20 cubic feet of gas; good if you are a heavy breather underwater or you plan on some fun deep dives. When filling a high pressure cylinder, be sure to identify that the cylinder's working pressure is higher than 3000 psi to take advantage of the cylinder's full volumetric potential. A 3000 psi fill on an HP100 is only 85.7 ft³ - significantly less than its rated 100 cubic feet of breathing gas. A low pressure cylinder, on the other hand has a working pressure of 2400 psi. During the first five years of use the cylinder can be filled to 10% over this working pressure to 2640 psi, but this is negated after the cylinder's first hydrostatic pressure test servicing (five years from the original factory hydrostatic test stamp date). Although it is not sanctioned, some fill stations will give a "cave fill" to a low pressure cylinder: filling the cylinder beyond its rated working pressure, giving the the cylinder a capacity to hold a higher volume of gas than it is rated to hold. High pressure steel, and aluminum cylinders cannot be overfilled in this same manor.
For example: A LP95 holds 95 cubic feet of gas @ 2640 psi. A cave fill to 3500 psi gives the cylinder 125.9 ft³. Double LP95's (190 ft³ @ 2640 psi) with a cave fill contain 252 ft³ of gas.
Dimensions:

An illustration of scuba cylinder size vs. its filled contents.
Here, a model stands next to an eighty 1 ft³ boxes, and
an aluminum 80 scuba cylinder.

Click image to enlarge
View a text version of this chart (Google Docs/Drive)
Chart recreated via Laymon, Lynn. "A Tank is a Tank."

Dive Training Magazine November 2004

 
Height Tanks
17" HP65
20-21" AL63, LP66, HP80
24" LP80, LP95, HP100, HP119
26" AL80, AL100, LP85, LP104
28-30" LP120, HP120, HP130

 
Diameter Tanks
6.9" AL72, LP85
7.25" AL63, AL80, LP80, HP80, HP100, HP120
8" LP95, AL100, LP104, HP119, LP120, HP130

Suggested links: Catalina Cylinders Luxfer Cylinders.com deep-six.com/page66.htm divegearexpress.com/library/tanks.shtml
Valves:
  • K-valve - This is currently the standard, and most common configuration of a valve used by many cylinders which requires only one first stage regulator.  The on/off handle is located on the valve's right side (the left side of the picture, as the valve is facing the camera. Comparatively, your right hand  that you will use to operate the valve when wearing your gear will be on your friend's left if you are facing each other), and the burst disk will usually be located on the left side or in the back of the valve.  The valve stem is located below the threads on the bottom of the valve.  This extends further into the cylinder and acts as a straw: if any liquid were to be contained inside the cylinder, this stem would restrict it from being blown into a regulator when a diver is upside down in the water.  This is why it's important to inspect your cylinder annually.
K-valve with a yoke fitting
  •  J-valve  - Here is an older style valve that is similar to a K-valve, except there is an additional knob on the diver's left side.  When the pressure in the cylinder is low (around 300-500 psi), this valve will start to act as if it were empty, by restricting the flow of gas to its regulator.  Turning this secondary knob opens a mechanism in the valve to deliver the remaining gas to a diver, thus warning a diver that the cylinder is almost empty if a submersible pressure gauge is not being used (not recommended - this was just old technology).
    J-valve with a removable DIN-to-yoke insert
    • H-valve -An H-valve is used on a single cylinder with two independent fist stage regulators, with a single octo attached to each. Using two regulators with this valve gives a diver a degree of redundancy: if one first or second stage regulator malfunctions and begins uncontrollably free-flowing or freezes over, the gas supply can be completely shut off while the second regulator set continues to receive gas from the tank and deliver breathing gas to the diver.
    H-valve with a valve plug, detached valve stem,
    and two DIN-to-yoke conversion plugs
      This configuration is recommended for Intro Cave, Decompression, and other technical divers who are not using doubles.  This is a common configuration, however the inverse configuration is also popular: where the H-adapter will simply connect to the other side of the main valve.  The right post configuration above will not work with parts from a left post H-valve. H-valves can be converted to a K-valve by draining the cylinder (0 psi/bar), unscrewing and removing the H-adapter portion, and replacing the adapter with a valve plug (shown in the lower right of the photo above).  Another name for this is a "modular valve."  Note the thicker, longer portion of the valve that connects the H-adapter in relation to the K-valve in the previous image.  This is much stronger which allows a second regulator to be safely connected to the very high pressures contained in the cylinder. Further, a right- and left- H-valve can be connected together by replacing the H-adapter valves with an isolator valve (see below).
    • Isolator valve - A mechanism that connects two cylinder valves together is called an isolator valve or a crossbar (no valve).  This valve gives a diver the option of shutting off the connection between the two tanks, thus isolating their gas supplies independently in an emergency, offering a high degree of control and redundancy.  Connecting two valves together with an isolator valve is called a "manifold."
    Isolator valve
      If one of a diver's first or second stage regulators fail, that regulator's valve can be shut off while still giving a diver access to breathing gas both cylinders via the backup regulator.  Gas will pass through the isolator valve to the working regulator.  If a leak develops that remains uncontrolled by operating the right or left valve, the isolator valve can be closed to "isolate" or preserve gas in at least one of the non-malfunctioning cylinders.
    • Manifold - The common "double" cylinder configuration connects two cylinders together with a manifold, which is the combination of a "right" valve", a manifold, and a "left valve."
    A manifold is a combination of a right, isolator, and left valve.
    Photo courtesy Cave Adventurers
    • Y-valve -A simplified version of the H-valve is the Y-valve, which allows two independent first stage regulators to be connected to a single cylinder.  This configuration cannot be combined with any other type of valve or cylinder.
    Y-Valve
    Suggested links: http://www.divegearexpress.com/gas/mvs.shtml
    DIN vs. yoke fittings:
    DIN K-valve with a removable yoke insert.
    Photo courtesy AquaViews.net


    Scuba regulators attach to cylinder valves in one of two ways
    1. A yoke regulator fits over a valve and is held in place when the regulator is pressurized.

    1. A DIN regulator screws into a valve and is held in place with threads that are tightened further when the regulator is pressurized.
    A yoke-based regulator is usually less expensive and is great for open water diving.  When you begin to dive overhead environments or use high concentrations of oxygen (above 40%), it becomes important to use a regulator with a DIN fitting since DIN valves are less likely to become dislodged from the cylinder; above or below the surface. Converting between the two usually only goes one way.  A DIN-to-yoke adapter can be attached to a DIN regulator to fit a yoke cylinder. Some yoke regulators have a conversion kit (which are usually pretty expensive for some reason) where the A-clamp can be completely replaced with a new DIN fitting.

    DIN to yoke adapter for a DIN regulator.

    Suggested links: http://www.nigelhewitt.co.uk/diving/din.html
    Painting / finishing:
    There are a number of reasons why painting a scuba cylinder is a bad idea.
    • Scratches or chips in paint or other finishing coatings allows water to become trapped between the metal of the cylinder and the coating itself.  This can quickly lead to rust or corrosion of the cylinder
    • Stickers can trap water against the cylinder as well.  Whenever possible, use small stickers, and avoid large stickers as tank wraps.  Mesh warps are acceptable, as water does not become trapped against the cylinder, and the plastic sleeve provides a degree of scratch/clanking protection
    • Using heat to cure paint onto metal cylinders will weaken the metal and become an extremely dangerous hazard.  Never use heat in any part of a painting process
    • Paint covers corrosion and damage.  Some scuba shops/filling stations will refuse to fill an after-market painted cylinder
    • In order for a cylinder to pass annual visual inspection, the surface must be free of after-market paint and decals


    There's a dilemma I have with this issue. On the one hand, diving shouldn't be about looking super cool.  On the other hand, if you're spending hundreds of dollars on expensive equipment, you might as well invest in something that makes you happy every time you see it.  Certainly, a shot-blasted or brushed aluminum tank isn't as flashy as a red one, but it'll get the job done.  For full disclosure, I purchased two candy apple red, glossy coated Aluminum 80's for my first set of tanks, and my girlfriend bough pink tanks!  Our technical gear are shot-blasted double steel 95's, and she has a single white steel 95s with some very small stickers for decoration and a pink tank mesh.
    Suggested links: xsscuba.com/tank_lux_tech_paint.html


    Saturday, July 14, 2012

    DIY GoPro Extension/Boom Pole/Monopod

    A wide angle shot from a higher than usual aspect looks really cool and a boom pole is pretty easy to make. Further, a monopod (a more portable version of a tripod) can give your video or sequence photography some much needed stability.  I gathered some cheap parts and finally took a stab at it.

    You can make it as simple as using the GoPro "handlebar and seat post bicycle mount" and attaching it to a length of PVC pipe, or a broom.  Done.

    GoPro Handlebar Seat Post Bicycle Mount - $20
    I went a little bit further and combined a GoPro tripod mount with 2' sections of detachable PVC pipe.  Here's how I set it up:
    Parts:
    • Buy a desired number of ½" x 2' long sections of PVC pipe, or cut a single long piece into appropriate lengths ($4-8, tops)
    • Grab a couple ½" PVC end caps (I ended up leaving the bottom end open, but I'll use an end cap on the bottom of the the pole when using it as a monopod), and a few male and female ½" threaded PVC adapters (under a dollar each)
    • Pick up the following nuts & bolts from a hardware store (Ace Hardware is easy to navigate)
      - a ¼"-20 thread count by 1½" long brass or stainless steel flat head bolt (80¢)
      - a ¼"-20 hex nut (33¢)
      - a A ¼"-20 wing nut (95¢)
    ¼"-20 bolt is the standard camera/tripod bolt size.
    The tapered head will help snugly fit into the PVC end cap.
    Assembling:
    Putting the pieces together is pretty straight forward.
    • Attach the GoPro tripod mount to the camera housing
    • Drill a hole in the top of the end cap with a ¼" bit.  From the inside face of the PVC cap, counter sink the hole just a little bit with a 5/16" bit which will give a little more room for the tapered head of the bolt to sit
    • Now simply tighten the bold down with the single hex nut on the outside
    • Finish the top section by attaching the wing nut upside down to help secure the camera when it's attached.  I was sure to have an extra hex nut to help secure the wing nut when a camera is not attached so the wing nut doesn't fall off
    • Simply pressing or tapping the end cap assembly onto the end of a piece of pipe should be enough to securely fasten it securely.  You could glue it, but it'll be a pain if you want to change something in the future
    Finished top section
    • Finally, glue the male and female end caps to a few lengths of PVC pipe so they can quickly attach to one another, making a small or long boom pole.
    ½" PVC coupling
    • You could even tape off the threads and the head and spray paint the finished pole.  I wouldn't mind that at all.
    Shooting techniques:
    Since you will have less control over exactly where the camera is pointing, you will generally want to shoot multiple pictures and select the best shot in post production.
    • Burst mode: The GoPro Hero cameras allow a photographer to take a number of pictures in rapid succession.  The Original HD Hero only allows 3 shots, but the Hero2 can be set to shoot up to 10 images in rapid succession.  There is a slight delay from when the shutter button is depressed to when the shots actually fire. If you're working with a single section or short pole, the burst mode can work well for you, allowing enough time for the camera to be raised to an acceptable height.
    • Time lapse: For longer boom poles, this is likely your better option.  Set a short frame rate (one frame per second) and hold the camera where you think the best view will be for a few frames.  Especially with wobble, a few extra shots could help find the best view possible.  Try moving around just slightly to get a wider variety of shots if necessary.
    • Monopod use: Shooting smooth video is key to good video production.  Nobody wants to watch a shaky video.  Place the bottom of the pole on the ground to help stabilize a video or a sequence of shots.  Have an extra PVC end cap for this use.
    • Beach/sand use: Stick the open end (no end cap) into the sand and set the camera to video or time lapse for a quick and easy way to record a sand castle or to take self portraits and other video.  If the ground is loose enough away from the beach, you can try this type of shot in other locations as well.

    Results:
    The only problem is that PVC is a little wobbly when it gets long, so you may want to spring for a thicker grade pipe.  Either way, it bends with increased length.

    I started with three 2' sections which gives me an extra 6' perspective above my reach.  A car or ladder will extend that even further without additional pole wobble.  The 4' boom pole wobble (using only 2 sections) is minimal and moves around mostly because of principles of leverage.  A 6' boom with a strong two-handed grip seems like it would be a little more stable.

    Here are a few overhead photos I've been able to take with all three sections connected.  Holding the pole over my head creates a camera perspective from around 15' above the ground.

    A slightly overhead shot of my house from around 15' up -
    pretty much level with the heads of the sabal palms.

    The sea grapes in front of these cars are at least 8' high which
    ends up blocking  the view of the water from the parking lot.

    Tuesday, November 8, 2011

    Changing a high pressure hose on a scuba regulator rig

    There's really not much to switching out hoses on a scuba regulator rig, but there are a few differences between high pressure and low pressure hoses.
    • Low pressure hoses have a general working pressure of around 140 psi; much lower than the pressure contained in the cylinder.  The ends are almost as wide as the hose itself to allow gas to flow through it easily.
    Wide hole of a low pressure hose

    • High pressure hoses have a working pressure that is equal to the compressed gas in the cylinder so a diver can constantly monitor how much compressed gas remains on a dive.  There is a very small hole on the end of the hose that connects to the first stage regulator.  In case of failure, a stream of gas at 3000 psi will be released, however it will only be in a tiny stream so it will take far longer to deplete the cylinder of all compressed gas.
    Changing the hose:
    • To change a rig's high pressure hose that connects the submersible pressure gage (SPG), turn over the console (if applicable) and remove the plastic protector cover from the back of the rubber housing.  This will allow you to bend the rubber console and push the gage out of the unit.

    • Bend the rubber console while gently pushing on the back of the gage.  
    • Use two wrenches to loosen the nut, then continue to unscrew the nut to remove the SPG from the hose.
    •  Back the old hose out of the rubber console.
    • Now you will be left with the gage, the "swivel spool" which is the o-ring hardware that allows the gage/console to rotate at the end of the hose, and the high pressure hose itself.  The swivel spool will remain in either the SPG or the hose, so use pliers to gently remove the piece.  Do not let any dust, hair, etc. to stick to the lubricated piece.

    • Feed the new hose through the console, replace the swivel spool in the SPG, then attach the SPG to the end of the high pressure hose and tighten.
    • Pull the hose back through the console and fit the gage snugly into place.  This may take a few minutes.  Do not use too much force or pull too hard on the hose.  A bit of wiggling should suffice.

    Read more:
    http://www.divegearexpress.com/regulators/hoses.shtml

    Wednesday, May 27, 2009

    DIY Inexpensive Computer

    My laptop is a few years old now (Hanukkah/Christmas gift in 2005) and I haven't upgraded the RAM or anything yet. Although it works just fine for my needs it begins to be a little slow during mixing and mastering of large projects. Putting together a near top of the line machine that is memory and processing heavy from commercial web sites (Dell, etc.) usually comes with tons of expensive junk that I don't want nor need (high-end video, expensive CD/DVD drives, Windows Vista, other software bundles, warrenty, etc.).

    I decided to save a little money on a case (usually between $40 and $100) and went for a unique design. Mounting a computer on a piece of plywood is sort of artsy (technology vs. simple wood), looks neat, and with all of the pieces exposed the computer will stay very cool; thus will run faster.

    [Click to enlarge]

    Overview of building a computer from scratch:
    One can easily put together a powerful computer on any number of commercial websites (Dell, etc.), but when it comes down to it building a computer from scratch is not that difficult. Seven basic pieces make up a computer these days. You'll need a motherboard to route all the signals from the various components, a processor to run calculations and to "think," CPU cooling fan that sits on top of the processor to keep it cool (do not run a computer without this or you will fry the processor), memory/RAM to provide a quick place to store calculations for the CPU to process, a hard drive to store information, and a power supply to distribute power to all of these components. Usually you'll want a CD/DVD drive as well, but even these are becoming outdated media - especially since it's possible to boot to a USB jump drive to install an operating system and other software.

    Most small desktop computers have audio, video, eithernet, and USB components built into the motherboard so these are either A) not necessary to add, or B) can be added/upgraded via PCI slots. I added a firewire hub via PCI card. Audio and video upgrades won't be necessary since I will be using my mixer as the auido card (via firewire), and my needs are not graphics-heavy so I don't need to use an upgraded graphics card (usually between $40-$200 for gamers/video producers). Don't forget a mouse, keyboard, and monitor. NOW it's done.


    Construction / Pricing:

    Computer - $256.99 (add $20 shipping)
    • Intel D945GCPE 3.0 GHz MicroATX Motherboard - $56.41
      - Onboard audio, video, eithernet, USB 2.0
    • Intel Pentium D 925 3.0 GHz Dual-Core Processor - $73.58
    • CPU Cooling Fan - 24.99
    • 2 GB DDR2 RAM - $59.99
      - 2 x 1024 MB sticks
    • 350-Watt ATX Power supply - $24.99
    • 4-port Firewire PCI Card - $16.99
    • I had a spare 80GB hard drive laying around but these are cheap (as of summer 2009, a 500GB internal SATA hard drive goes for 60 bucks. Can't beat that! [P.S. yes, you can beat that.])
    • I also had a spare CD/DVD burner (~$40)
    • Go to a local computer repair/electronics shop and pick up a soft booting power switch/restart switch, LED lights, and a small PC speaker. These plug into pins on the motherboard (illustrated very well on the motherboard's instructions sheet) and let you turn the computer on. The LED's will let you know when the machine is running, and the speaker beeps when the computer boots or has an error. These are very cheap: under $5.
    Mounting - $20-30
    • Plywood board (around 14" x 18" x 1/2")

    • Machine screws 1 1/2"
    • Rubber washers
    • Plastic spacers
    • Hex nuts
      - Mark and drill holes on the plywood where mounting screws secure the motherboard (look for the mounting holes on the motherboard)


    • Drywall screws
    • 4 rubber feet
      - Drill four pilot holes through the plywood
      - Drive a drywall screw (sharp point) through the hole; it should be a hand tight fit
      - Screw on the rubber stoppers

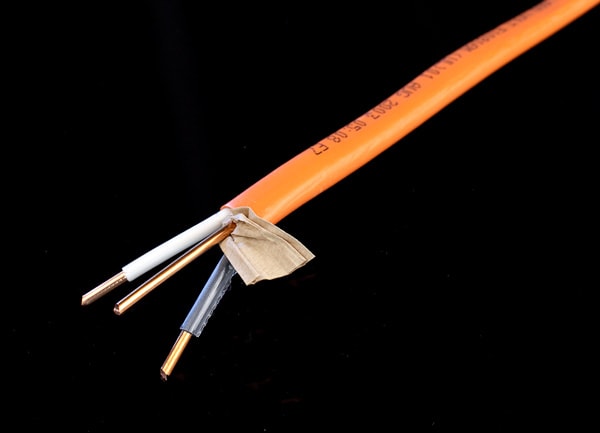
    • Romex / strong gauge wire
      - The two coated wires in romex wire bundles are great for mounting the power supply, hard drive, and CD/DVD/Floppy drives to the plywood. Do not use the uncoated ground wire
      - Drill small holes through the plywood, just large enough to fit the wire through
      - Use pliers to bend the wire around squared corners to fit the component well, and to pull the wire tight on the bottom of the board
    I added a couple more bolts/plastic spacers to help secure the drives/power box in place. Otherwise that's it. Now just add a monitor (I found a nice flat panel LCD on Craigslist for $100), keyboard, mouse, and install an operating system and you're ready to go.

    Thursday, May 14, 2009

    My Studio Hardware

    AKA Rack additions, $100 at a time

    I've been building my little studio for long enough now that I figure that I'd post my thoughts on what I've come across.

    Alesis MultiMix 12 FireWire 12-Channel Analog Mixer:


    [Click to Enlarge]

    My setup is based around this mixer when it's time to record. Lots of control over the inputs and outputs makes it great for controlling various keyboards, turn tables, effects, etc. in a live setting as well.

    Pros:
    • Firewire over USB allows track by track recording in a digital audio workstation (DAW), rather than USB which only sends a stereo mix of all inputs
    • 100 28-bit onboard effects are pretty decent - easy control over how wet/dry the effect will be for each individual channel
    • A little EQ and panning is standard. Not bad.
    • Onboard XLR / gain / phantom power - neat
    • Lots of output options / multi-out combinations
    • Easy effects loop (out/return) option available
    Cons:
    • Onboard effects are only applied to analog outputs - The digital mix going to the DAW via Firewire is dry. I've been meaning to try looping a wet stereo output through two channels, and recording just those two tracks via DAW, but that has its own problems. IT could work, but it's too much effort
    • Alesis has mostly shitty software support (along with M-Audio). A lot of reviews were complaining about their computers not recognizing it. It can be tricky, but just make sure to install all software before plugging it into a computer
    • Only four channels of XLR/gain: The expensive solution is to upgrade to the MultiMix 16 (for twice the price), or add a preamp to your rack. I chose the latter (below)
    All in all, this is a great starter to mid-range mixer. It was cheap, and built pretty well. The effects knob feels a little loose, but it's hanging in well enough. It provides great quality digital audio and minimal if any latency during recording. Very powerful for the price. Unfortunately it has been discontinued. I'd recommend picking one up if you find it floating around on Craigslist or something.

    Behringer Eurorack UB 1202 (outboard auxiliary mixer):

    The Alesis Multimix is a great way to record multiple tracks, but I don't always need to record all the tracks I need to hear in a recording session.  When I'm laying down drums tracks with my band, I find it helpful to hear as many of the other parts as possible (guitars, bass, vocals, etc.) so I don't have to struggle to listen for different cues that I'm not used to.  The guitar amps and vocals are brought up to level and mixed on this board, then a stereo signal is sent to an open channel on the main board and blended into my headphone mix.  This is a really powerful tool for around $80, new.

    Additionally it's a cheap, small, and effective mixer for a live show with four channels of gain, phantom power, plenty of outputs, and even some effects routing options.

    Nady PRA-8 Preamp
    :


    This is a pretty decent unit for around $100. I cannot complain about much noise at all - haven't noticed any additional noise from low quality microphones. It has 8 channels of gain to add to the Alesis mixer, and converts XLR inputs to 1/4" outputs - which work very well as additional inputs into the mixer. Two birds: RIP.


    Behringer DSP2024P Virtualizer Pro - Rack Effects Module:


    Next is the effects module. Two channels can be used in stereo on certain effects (ping-pong delay, etc.) or as two separate effects. I haven't used it to its full potential yet but it's a great addition to my rack for around $100. Very affordable, customizable, and extensible.


    Behringer AMP800 4-channel Headphone Amp:


    This is a nice little tool that splits left and right outputs from the mixer into four separate headphone channels; all of which have their own level and balance controls. This is very neccessary for collaborative work, or if another pair of ears wants to listen in on the mix. Again, cheap and effective.


    Furman RR-15x - Power Conditioner:


    Basically this is a nice rack-mounted surge protector; not much conditioning is happening. There are 8 outlets on the back and one for easy access on the front, all controlled by the single switch on the front. I was worried about lots of EM interference and buzz by having so many wires going on in the mixing cart (later post) however it's really not a problem. This may or may not be to thank. Probably not, though it absolutely keeps things tidy and simple. I run a spooled heavy duty extension cord to an outlet from the cart. One can find a cheaper surge protector for power management, but I'd say it's worth the extra few bucks to have it in the rack. It looks rad and keeps clutter and the rat king of wires to a minimum.


    Behringer V-Amp 2 Guitar Multi Effects Processor:


    One more $100 effects module, but I got this one cheap from a friend. Bad Aizzz. There are a bunch of shitty combinations of amps and effects, but there are also lots of really decent quality sounds. It lets you choose the amp style from (smooth blues to metal-face-murder-core), tone (Gain, Low/Mid/High EQ), and effects. THEN you can save your combinations and quickly change between them by hand, or by the inlcuded foot switch. Rad. There's a easy tap tempo button to control some of the delay effects, and a pretty decent onboard tuner mode.

    Con: There is a 1/2 second-ish gap of dead space between changing effects.

    That's about it for the cons. Cheap and versitile! Run this through some outboard reverb and layer it with some other instruments and it's a damn fine tool.

    Also, it seems pretty solid. I'd recommend looking for this on Craigslist / eBay for cheap.


    Korg mini-KP KAOSS Pad:


    Finally stepping up to the mighty $150 range. Totally worth the extra cash. Again, I have not used this to its full potential. I've barely made it through one entire round of futzing with each preset with Missy Elliot on my iPod and it has me drooling.

    This tiny little pad allows a user to control two effects at the same time with just the touch of a finger (or two). Tap tempo shows the actual tempo, and the dial will let you zero in on a target if need be. Rotate the dial to quickly change between 100 effects.

    Stereo RCA ins/outs, and a 1/8" "headphone" jack (which has a small volume control). Again, rugged as hell, so look for it used. Invest in the 4.5V power adapter.


    M-Audio Axiom 25 USB MIDI Controller:


    From my recent post describing how to correctly configure this thing, this keyboard turned out to be a rad little Midi controller. Right click on any control knob/slider in Fruity Loops and select "Link to controller," then move one of the controls on the keyboard. Bam. Done. It'll now control any parameter you want. Very cool.

    I could maybe use some more sliders, or maybe making half of the dials smooth (rather than all stepping/clicking dials), however there are additional midi controllers that can be connected via the Midi input.

    I suggest ASIO4ALL if you are having latency problems (i.e obnoxious lag time between hitting a note on the keyboard and hearing the note). Look for upcoming post on Midi brika-brak

    Sunday, April 19, 2009

    M-Audio midi controllers and my rage

    I'd say recently, but that's just not true. A few months ago I picked up my second M-Audio midi controller. Round one was the Oxygen 49 several years ago. I was familiar with the very strict rule of "thou shalt installith ALL software/drivers before thine plugs hardware into ones computering machine," and was very careful to follow all directions thoroughly and to the letter. Still, something happened and Lappy Tappy would not recognize any signals. Back it went.


    [M-Audio Oxygen 49]


    As a side note, I work in a pretty techy sort of industry. For a period of time I was installing and managing advanced relational database systems with no problem. I know how to perform geographically weighted regression, use agent based modeling to predict land use change; however, I cannot get a simple USB device to work properly. I can't imagine why Alesis, M-Audio, etc. all continue to provide such shitty, fakucta, and just terrible software support for great pieces of hardware.

    Anyway, I picked up my second M-Audio device: the Axiom 25. I figured that it was different enough from the Oxygen so that any remaining drivers/keys left in my registry would not interfere with the operation of this. (Also, these companies are terrible about leaving their grubby cheeto hands all over my computer. An uninstall should NOT leave registry keys for me to trip over later)


    [M-Audio Axiom 25]

    Of course a fresh install of the most recent drivers, downloaded directly from the M-Audio site did not work. I set this rather rad looking unit to the side and concentrated on school like a good kid.

    The problem is that after installing the keyboard, Windows claims that "New hardware is ready to use." Subsequent connections, however claim that a "New" audio device is found. This shouldn't be new...

    Also, Fruity Loops, Acid, Reason, Ableton, Midi-Ox, etc. do not recognize any input device as being present. Here's the trick:


    • Install the updated drivers from the M-Audio web site
    • Plug in and turn on the keyboard
    • Open the Device Manager
      - Right click on My Computer and choose Properties
      - Choose the Hardware tab
      - Click the Device Manager button
    • Expand "Sound, video and game controllers"
    • Right click on the generic USB Audio Device, and choose Properties
    • Select the Driver tab
    • Click Update Driver
    • Choose "No, not at this time" to let Windows fix it and click Next
    • Choose "Install from a list or specific location" and click Next
    • Choose "Don't Search. I will choose the driver to install." and click Next
    • A) In the Model box, choose "Axiom 25 USB" Driver if it is available
    • B) Choose "Have Disk"
      - Choose Browse
      - Navigate to the location of the downloaded driver, i.e. C:\Program Files\M-Audio\M-Audio Series II MIDI
    • A second driver should attempt to update itself. Repeat the previous few steps for the "Axiom 25 USB MIDI Driver" as well.
    This worked for me. The device appeared in all MIDI controlling software packages.

    Thanks to rorschach76 @ http://forums.m-audio.com/showthread.php?t=334 for the method