The only prerequisites are having a symbology for a shapefile saved as a layer file (color those county boundaries, right click on the layer in the table of contents, and click 'Save As Layer File...') and knowing where your data is saved. Bam!
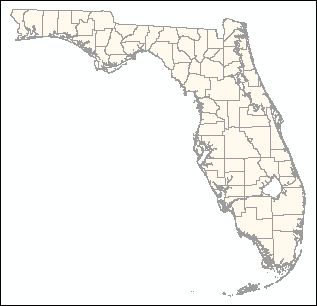
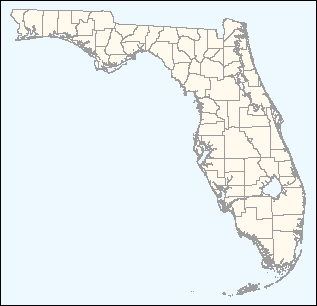
First, I want to import my county layer (again, with my favorite symbology already set). Next I will want to change the background color to a light blue to represent the water. This will also fill in the holes where water is present in bays, large lakes, and streams, etc., and might not be correctly included in a layer of hydrography.
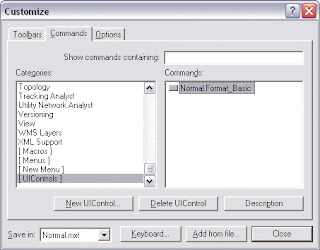
Start by creating a new button on a toolbar that will be used to trigger the events:
- Tools :: Customize
- Navigate to the the Commands tab in the Customize dialouge box
- Make sure that you are working in Normal.mxt (at the bottom in "Save in:") so this button is available for all subsiquent projects
- Scroll to the bottom of the Categories list and select "[ UIControls ]"
- Click the New UIControl... button and choose UIButtonControl, then click Create
- Rename the new control something like "Format" or "Format_Basic" (single click to select the control, then click one more time to edit its name)

- Drag this onto a toolbar - from here (with the Customize dialouge still open) right click on the button and change its name, button image, and then View Source to enter code
Private Sub Format_Basic_Click()Dim pMxDoc As IMxDocumentEnd Sub
Dim pMap As IMap
Dim pGxLayer As IGxLayer
Dim pGxFile As IGxFile
'Get the layer file
Set pGxLayer = New GxLayer
Set pGxFile = pGxLayer
pGxFile.Path = "C:\GIS\FL_Counties.lyr"
'Add the layer file to the active map
Set pMxDoc = ThisDocument
Set pMap = pMxDoc.FocusMap
pMap.AddLayer pGxLayer.Layer
pMxDoc.ActiveView.Refresh 'Refreshes the map view

This is the code to change the background color to light blue:
Private Sub Format_Basic_Click()Dim pMxDocB As IMxDocumentEnd Sub
Dim pActiveView As IActiveView
Dim pFillSymbol As IFillSymbol
Dim pGraphicsContainer As IGraphicsContainer
Dim pFrameElement As IFrameElement
Dim pRgbColor As IRgbColor
Dim pSymbolBackground As ISymbolBackground
'Get a reference to the layout's graphics container
Set pMxDocB = Application.Document
Set pGraphicsContainer = pMxDocB.PageLayout
'Find the map frame associated with the focus map
Set pFrameElement = pGraphicsContainer.FindFrame(pMxDoc.FocusMap)
If pFrameElement Is Nothing Then Exit Sub
'Associate a SymbolBackground with the frame
Set pSymbolBackground = pFrameElement.Background
If pSymbolBackground Is Nothing Then
Set pSymbolBackground = New SymbolBackground
End If
Set pFillSymbol = New SimpleFillSymbol
'Create a color object
Dim pBackColor As IRgbColor
Set pBackColor = New RgbColor
pBackColor.RGB = RGB(237, 249, 255)
'Apply color
pFillSymbol.Color = pBackColor
pSymbolBackground.FillSymbol = pFillSymbol
pFrameElement.Background = pSymbolBackground
'Refresh map
pMxDocB.ActiveView.Refresh

To combine these two functions in the same button click event, you will have to change the object name of pMxDoc in the second part of the code (I'll use the background color as the second part of the code) to something else, like pMxDocB (it's mentioned 3 more times after the Dim statement). This is because the two functions use different parts of IMxDocument and the code will blow up when you reset the object. Also, go ahead and comment out or remove the first refresh statement (pMxDoc.ActiveView.Refresh). Here's the combined code:
Private Sub Format_Basic_Click()One might ask, "Well why don't you just make a template, or set Normal.mxt to this look as a default?" My answers are, "Why not / why should I have to?" What about the other 50%'Part 1:End Sub
'Import Florida Counties layer file
Dim pMxDoc As IMxDocument
Dim pMap As IMap
Dim pGxLayer As IGxLayer
Dim pGxFile As IGxFile
'Get the layer file
Set pGxLayer = New GxLayer
Set pGxFile = pGxLayer
pGxFile.Path = "C:\GIS\FL_Counties.lyr"
'Add the layer file to the active map
Set pMxDoc = ThisDocument
Set pMap = pMxDoc.FocusMap
pMap.AddLayer pGxLayer.Layer
'pMxDoc.ActiveView.Refresh
'Part 2:
'Change background color to blue
Dim pMxDocB As IMxDocument
Dim pActiveView As IActiveView
Dim pFillSymbol As IFillSymbol
Dim pGraphicsContainer As IGraphicsContainer
Dim pFrameElement As IFrameElement
Dim pRgbColor As IRgbColor
Dim pSymbolBackground As ISymbolBackground
'Get a reference to the layout's graphics container
Set pMxDocB = Application.Document
Set pGraphicsContainer = pMxDocB.PageLayout
'Find the map frame associated with the focus map
Set pFrameElement = pGraphicsContainer.FindFrame(pMxDoc.FocusMap)
If pFrameElement Is Nothing Then Exit Sub
'Associate a SymbolBackground with the frame
Set pSymbolBackground = pFrameElement.Background
If pSymbolBackground Is Nothing Then
Set pSymbolBackground = New SymbolBackground
End If
Set pFillSymbol = New SimpleFillSymbol
'Create a color object
Dim pBackColor As IRgbColor
Set pBackColor = New RgbColor
pBackColor.RGB = RGB(237, 249, 255)
'Apply color
pFillSymbol.Color = pBackColor
pSymbolBackground.FillSymbol = pFillSymbol
pFrameElement.Background = pSymbolBackground
'Refresh map
pMxDocB.ActiveView.Refresh
of the time when I do not want this layout? This way I can add certain elements, and even add additional buttons to add other layers or elements such as transportation or hydrography on the fly.
Reference key phrases:
How to change the data frame background color
Add layers using ArcObjects
No comments:
Post a Comment