The Product
"58mm Telephoto Magnification Lens, Accessory for Cameras 58MM 2X Magnification Universal Teleconverter Telephoto Lens for Cameras"
The Pitch
"Bring objects you are photographing twice as close perfect for sports photography, bird watching, nature and anytime you need that extra distance. DOUBLE YOUR LENS FOR FRACTION OF THE COST OF NEW ZOOM LENS"
The Price
Only $13.99 on eBay, or $12.99 - $19.99 on Amazon. It's even available on B&H for $32.99 branded as Vivitar. All available for various filter sizes.
What?
Many
beginner DSLR packages on Amazon come bundled with a lot of beginner gear that I endearing refer to as toys. In that previous link, I've given my perspective on the usefulness of many of these common items.
Tl;dr - they're fun to play with for absolute beginners, and the gear is generally outgrown very quickly. Some items last longer than others; some items are not safe to use from the beginning.
One item in particular that I'll argue isn't particularly helpful from the very beginning is the 2X to 2.2X Telephoto Adapter, marketed with different branding depending on where you're seeing it sold.
Test Gear
Since this lens came with a basic DSLR gear package, I'll test it with two other common beginner/kit lenses and an intro body:
- Canon T5 body
- Canon 18-55 f/3.5-5.6 IS II "kit lens"
- Canon 75-300 f/4-5.6 III USM "kit telephoto lens"
Test Conditions & Photos
The following are the resulting photos with minimal processing - just a slight exposure adjustment and nominal sharpening added to each raw file, then they were exported as JPEGs. As a parent to a toddler and an infant, I haven't had a ton of time to test this in optimally bright and uniform conditions of afternoon daylight. These photos were taken close to sunset with low level clouds passing in front of the sun so daylight was fading very quickly.
Ideally an ISO of 100 should be used while maintaining a high enough shutter speed to mitigate camera shake. While I came close to mitigating camera shake, a tripod/lower ISO/better testing conditions are desirable for a better comparison.
Additionally, I accidentally shot at 50 mm instead of 55 mm for the 18-55 control shot with no adapter.
Maybe I'll get around to updating this image set.
Images:
Kit Lens
 |
18-55 @ 50mm
ISO 100, f/5/6, 1/125s |
 |
18-55 @ 55mm + 2.2x Adapter
ISO 100, f/5.6, 1/125s |
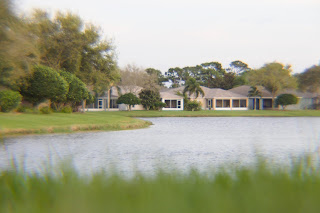
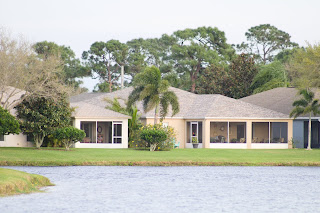
Wide Kit Telephoto
 |
75-300 @ 75mm
ISO 400, f/5.6, 1/250s |
 |
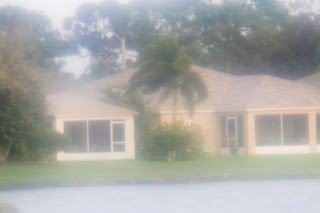
75-300 @ 75mm + 2.2x Adapter
ISO 400, f/5.6, 1/200s |
Long Kit Telephoto
 |
75-300 @ 300mm
ISO 1600, f/5.6, 1/200s |
 |
75-300 @ 300mm + 2.2x Adapter
ISO 1600, f/5.6, 1/200s |
Comparisons
Magnification is apparent - at the cost of sharpness. The center clarity is pretty hazy, but the edges are full-on muddy.
Kit Telephoto vs. Adapter
This is the most important comparison. Extending the kit 18-55 mm lens with a 2x tele adapter is significantly less sharp and more heavily distorted with image degradation issues.
Wide Kit Telephoto, Adapted
|
| 75-300 @ 75mm + 2.2x Adapter |
Image degradation is absolutely apparent, and this will be as best as the image quality gets on a telephoto lens.
Long Kit Telephoto
ISO 1600 is my personal limit of ISO speed on this intro body to balance noise in low light. This kit telephoto lens works best around f/11, and f/5.6 is often too soft @ 300mm for really enjoyable results. 1/200s is far too slow to shoot at 300mm handheld.
Despite those very important and clearly sub-optimal shooting conditions, it cannot be any more apparent how much image degradation is occurring. Terrible sharpness, awful contrast, muddy/abberated colors, etc. Just night and day bad.
Conclusions
These test photos are essentially straight out of camera JPEGs. No effort was made to clean up noise, sharpness, color, contrast, texture, etc. so these are quite unsightly as-is. Any photo taken with a camera (film or digital) needs some amount of work to be developed into a pleasing photograph. These have the absolute minimum amount of processing to share across the Internet.
I'm used to shooting
a lot of work with my kit telephoto lens and I have learned to mitigate its shortcomings quite significantly. These photos are pretty crude, and I would say that there are a few instances where the telephoto adapter can be improved; but by and large any improvement attempt is much better addressed by simply cropping in on an un-adapted lens.
Test shooting conditions aside, there is no doubt that this adapter is not helpful, and simply cropping will provide vastly superior results.
Don't bother with this lens.
The least amount of negative distortion and image degradation occurs at widest focal lengths on a given lens, and it immediately gets unusable on a dedicated telephoto lens. Even the Internet's most hated lens, my EF 75-300 mm, is far superior - and it can be picked up used as low as $25-60 on eBay or $60 on KEH or MPB.
Save the $15-35, and shoot for a kit telephoto between $25-60 used, or under $200 brand new.
There's More:
The photography community exhibits an incredible amount of gate keeping. That is: advanced users disappointingly often provide intellectually dishonest, lazy answers to novice shooters that give a perception that newcomers are not worthy of attaining high-end image quality without paying a toll of incredible expense or sheer luck in gaining experience from rote practice. In the case of this test, folks will suggest incredibly expensive lens options and discount the value of kit telephoto equipment, even though there are many truths to the image quality differences between kit lenses and advanced/pro gear.
That is not my intention with this review. There is value in using most basic gear. Of course if one has the means, a middle of the road package will provide plenty of quality to bolster success in a hobby without breaking the bank. In many cases, however, there is plenty of room to grow with absolute beginner gear on the lowest end of the budget spectrum.
Again, this telephoto adapter lens is not worth it.